

I learned a screen printing method a while back that I was able to teach at work (...one of the random but fun things I got to do). The process is not quite your traditional screen printing method, but it's a relatively quick and easy one to do at home, with clean results. I have been going a little screen print happy on my side, so just thought I'd share the process so you can too. :)
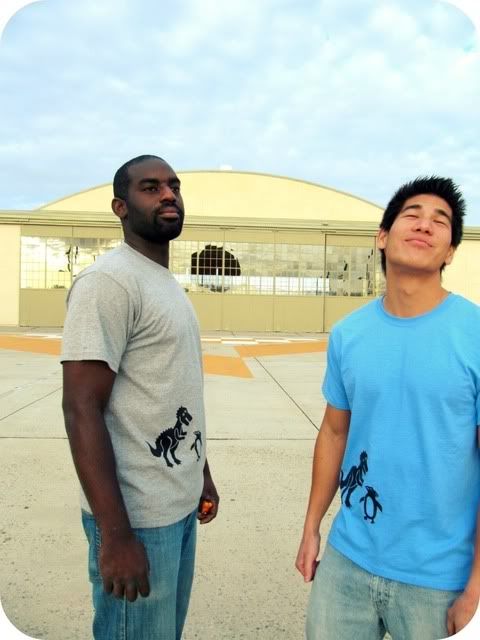
Step 0: Pick a design/image/logo. My wondrous design was inspired by two in my small but mighty work family (all of whom I love so dearly). They've become like brothers to me over the past 3 1/2 years when we first started work together. They induce what they've dubbed "Anabel's rage face" on occasion, but mostly they are making me laugh, inciting interesting conversations, teaching me new things, and making work a better place. Anyway, their friendship has totally inspired me to add "write a children's book" onto the bucket list...and somehow these character representations totally make sense.
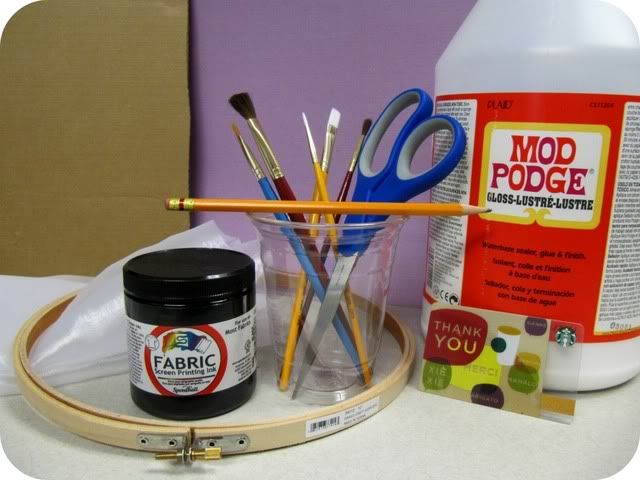
You'll need:
Design/image
Embroidery Hoop (bigger than your image)
Organza (big enough to cover over your hoop)
Mod Podge (or other non-water soluble glue. You don't need the gallon bottle; 8 oz. will go a long way. Optional: drop a little food coloring in the Mod Podge and stir. This helps show where you've painted since Mod Podge and other glues generally dry clear)
Various Paintbrushes
Screen printing ink (I like Speedball--Eco-friendly and non-toxic)
Squeegee (a used gift card or hotel room key work great)
Piece of cardboard or magazine
Pencil + Scissor
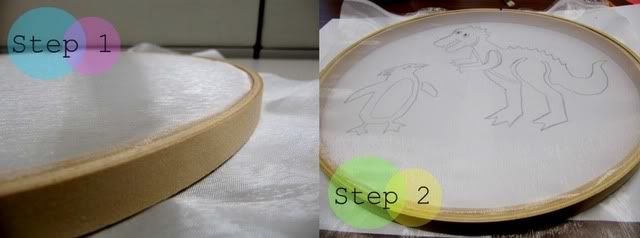
Step 1: Layer from bottom to top:
The Inner hoop, organza, and the outer hoop. Tighten the hinge while pulling the edges of organza to create a very taut screen (as pictured)
Leaving a 1-2” perimeter, trim the excess organza around the hoop.
Step 2: Place your hoop, screen side down, on your image and trace all lines onto the organza with a pencil.
Next you’ll need to determine your negative & positive space. (Shout out to my 10th grade art teacher, Mr. Hamel) Your positive space being all the areas you want printed on your bag, and the negative space being just the opposite.
* You can place an ‘x’ or other indicator in the areas that are positive space or vice versa. –this will prove helpful in the next step.
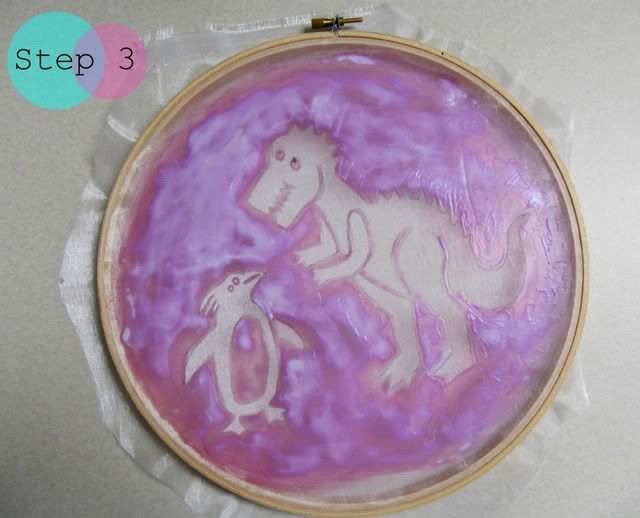
Step 3: On your workspace, flip your hoop so it’s sitting screen side up. Use various brushes to paint Mod Podge on all the negative spaces of your hoop (meaning all the spaces you DO NOT want ink to go through).
Working in thin layers and allowing each layer to dry in between helps here. Also, the mod podge tends to puddle on the back. Turn it over on occasion and smooth out the ‘puddles.’ This will also help expedite the drying process. Do enough layers so there are no holes in the negative space (i.e.: purple areas in the image above)
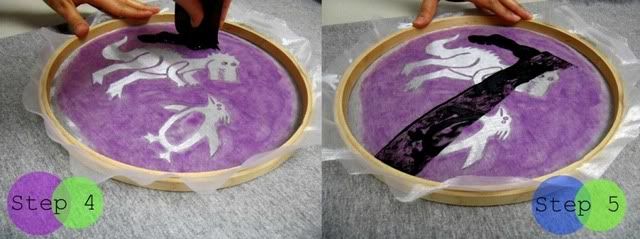
Step 4: Once the Mod Podge is completely dry, place your hoop screen side down on the item you're printing on. Make sure to place a piece of cardboard or a magazine in between the two layers of fabric to prevent ink from seeping through during the screenprinting process). Scoop ink on one side of your hoop.
Step 5: Using gentle but firm pressure (note how bent the card is in picture 4), move your squeegee in sweeping motions to press ink through your design.
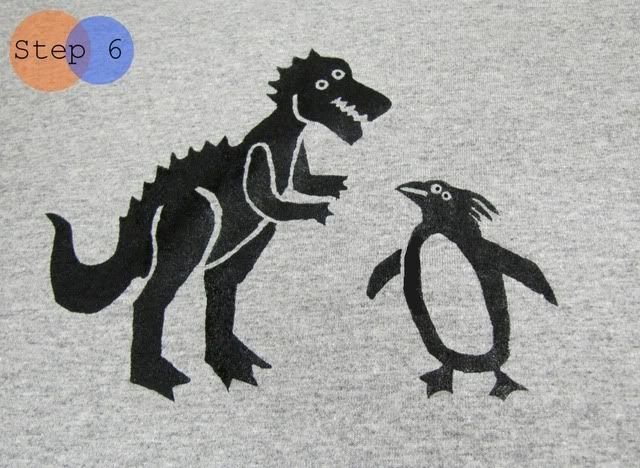
Step 6: Remove your hoop slowly with both hands to reveal your printed image. Use a paintbrush to fill in any holes if needed.
Set image with heat after ink has completely dried. Make sure to wash screen in between uses. Screen might need occasional tightening if you use it over and over.
Optional Step 7: Make your friends (design inspirations in my case) model your creations.
cool!
ReplyDeleteThis is such a great tutorial Anabel!! And I love dem boys... their model shots are priceless
ReplyDeleteThank you because you have been willing to share information with us. we will always appreciate all you have done here because I know you are very concerned with our. Electric flat screen printing machine
ReplyDeleteSuch a very useful article. Very interesting to read this article.I would like to thank you for the efforts you had made for writing this awesome article. apparel screen printing
ReplyDelete