Showing posts with label recipes. Show all posts

Thursday, January 17, 2013

Roasted Brussel Sprouts a la David Chang


I remember hearing about David Chang's Brussel Sprouts on an episode of No Reservations...
The heralded chef of Momofuku fame took the sprouts of the menu because....they became too popular. I'll try not to butcher this, but it was something along the lines of not wanting his creativity to be driven by what the masses wanted, but rather his passion to cook, create and be creative. Which is kind of awesome...and probably only something you can do if you're David Chang.

Well if you're like me and didn't get to try them before they were pulled from the menu, the chef was kind and generous to share the recipe with the world.

I merged two recipes that I found (here and here), and the results were pure 'delciousness' as D. Chang would say. The key is to get a good char on the outside leaves, leaving them crispy and a dark brown or black color. I prefer to cook them on the stove top, but they can also be done in the oven. (Both methods are below). And if you've never cooked with fish sauce, take heed: keep your nose out of the fish sauce bottle.


Ingredients:
2 pounds Brussels sprouts, trimmed and halved lengthwise
3 tablespoons canola oil
2 tablespoons unsalted butter

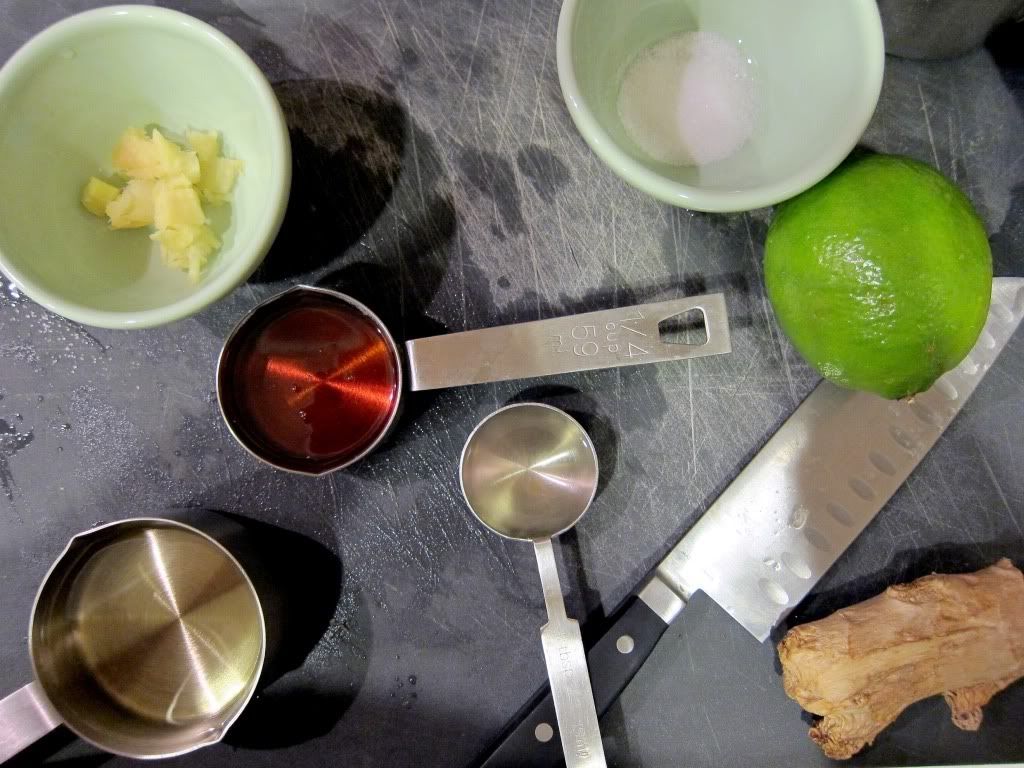
To make the dressing, combine the ingredients below till sugar is dissolved:
1/4 cup Asian fish sauce (preferably Tiparos brand)
1/4 cup water
1/4 cup sugar
3 tablespoons finely chopped mint
2 tablespoons finely chopped cilantro stems
1 garlic clove, minced
1 (1 1/2-inch) fresh red or green Thai chile, thinly sliced crosswise, including seeds
Juice of 1 lime

To make the puffed rice topping:
1/2 cup crisp rice cereal (e.g.: Rice Krispies)
1/4 teaspoon canola oil
1/4 teaspoon shichimi togarashi (Japanese seven-spice blend, available at Asian markets)

Garnish: cilantro sprigs; torn mint leaves; chopped scallions

1) Heat 5-6 tablespoons of olive oil in a large skillet over medium-high heat. Get the pan to be super crazy hot and almost smoking, then cook the brussel sprouts, cut side down (careful for splatter!). Turn the heat to medium and sear till browned, about 2-3 minutes. Turn the brussel sprouts over and cook for another 3-5 minutes, till the outsides are nice and crisp. 

For oven cooking, preheat to 450°F with rack in upper third.
Toss Brussels sprouts with oil, then arrange, cut sides down, in a 17- by 12-inch shallow baking pan. Roast, without turning, until outer leaves are tender and very dark brown, about 40 to 45 minutes. (Check midway that the bottoms are not burning). Add butter and toss to coat.

2) Make the topping by cooking the cereal, oil and shichimi togarashi in a small skillet over medium heat, until rice is coated and begins to turn golden, about 3 minutes. Stir occasionally to prevent cereal from burning. Transfer topping to a bowl and let cool. 

3) To plate, place sprouts in a serving bowl, then toss with just enough dressing to coat. Sprinkle with puffed rice. Garnish and serve the remaining dressing on the side.

Pin It


Tuesday, July 24, 2012

green grape + lime frosty

It's been hawwwt these past few days. And though sweating straight out of the shower may not always the most pleasant feeling, I love how amazing a cold drink or slice of watermelon is when the temperatures get high. Can't beat it. Here's a simple, incredibly refreshing concoction I learned from the wonderful catering folks at Whole Foods to help you cool off.
Just blend:

1 cup of green grapes
1/2 lime (rind and all)
1 cup of ice
To make it a frozen cocktail, blend with tequila. Serve with coordinating green straws and stay cool friends.

Pin It

Monday, July 23, 2012

fresh lime chiffon cake


This was my second attempt at making this cake. The first was over 1 year ago for Abe's birthday...and I failed miserably. My cake was about 3 inches thick, dense, and had this really weird spongy texture. I'm kind of embarrassed now as I'm reliving it...only because I still served it up at this really nice restaurant and to good friends who ate it obligingly (sorry guys!).

Anyways, the first time I tried this cake (made by my baking guru, Karena), I savored each delicious bite.... then greedily took the leftovers home to eat for breakfast the next day. The delicious memory paired with round cake pans I scored on sale at Sur La Table, inspired me to give it another try. Yes, it was quite dramatic. I followed the directions to the T and used a KitchenAid mixer this time (instead of a hand mixer) to whip the egg whites into a fluffy cloud mass with stiff peaks. Big difference.

Cakes came out perfect. Light, fluffy, fresh, not overly sweet. Balance was restored. Wounds healed, baking cajones slightly given back, etc. etc. It's a nice divergence from the usual chocolate or vanilla cake, not to mention it's from Cooking Light (so don't feel too bad for cutting yourself a big ass slice). Labor of love? Yes. Worth it? Definitely.


Photobucket
To make the filling, combine:
1 teaspoon finely grated lime rind
1/4 cup fresh lime juice (about 2 limes)
1 (14-ounce) can sweetened condensed milk

Cover and chill in the refrigerator for at least 3 hours.  


Ingredients:  
Cooking spray
1 tablespoon cake flour
2 cups sifted cake flour (7 1/2 ounces)
1 1/4 cups sugar, divided
2 1/2 teaspoons baking powder
1/2 teaspoon salt
7 tablespoons canola oil
1/3 cup fresh lime juice (about 3 limes)
3 tablespoons water
1 teaspoon finely grated lime rind
1 teaspoon pure lemon extract
3 egg yolks
8 egg whites
1 teaspoon cream of tartar
Garnish (optional):
Fresh mint sprigs 
Fresh blueberries 
Lime wedges

To prepare:
1) First prepare cake pans. Coat the bottom of your 8" round cake pans with cooking spray (no need to spray the sides). Line the bottoms with wax paper and dust with a little bit of flour. This whole process helps the cakes pop out of the pan when they are finished baking.

2) Lightly spoon 2 cups cake flour into measuring cups and level off with a knife. Sift into a large bowl and combine with 1 cup sugar, baking powder, and 1/2 teaspoon salt. Whisk ingredients until combined. 

3) In  a separate medium bowl, combine oil, 1/3 cup lime juice, 3 tablespoons water, 1 teaspoon rind, lemon extract, and egg yolks; stir to combine. Add this mixture to the flour mixture and mix until smooth.

4) Now for the fluffy egg whites. Beat egg whites in a stand mixer on high until foamy. Add cream of tartar until soft peaks form, then add the rest of the 1/4 cup of sugar one spoon at a time, until stiff peaks form. Gently stir in 1/4 of the fluffy egg whites into the flour mixture; gently fold in the rest.

5) Divide cake batter in thirds and pour into prepared pans. You can break any air pockets by cutting through the batter with a knife. Bake at 325° for 20 minutes or until cake springs back when lightly touched. Cool cakes in pans for about 10 minutes; then remove from pans, remove wax paper, and then cool completely on a wire rack.
 
To assemble the cake, place 1 cake layer on a plate or cake stand. Spread generously with lime filling (about half). Repeat step, topping it off with the third cake layer.  Spread with frosting--I used this recipe, omitted the chocolate, and added 2 tablespoons of lime juice, which really adds a nice light freshness. 
Garnish with mint, blueberries, lime wedges, or leave as is.

Photobucket

Pin It


Wednesday, May 16, 2012

Broccoli Cornbread


Last year, my coworker friends and I started a tradition to celebrate birthdays. We exhausted some of the usual lunch spots so began holding Iron Chef challenges to celebrate the birthday honoree(s).  It was a slow start, but our food eventually graduated from store bought items to more elaborate dishes (e.g.: prosciutto wrapped stuffed dates, smoked tri-tip, authentic Filipino food, chorizo sliders...).  It's been a fun way to get out of the restaurant rut and learn new recipes. Did I mention there is a giant golden whisk trophy involved? It's kind of awesome. Anyways, this Cottage Cheese + Broccoli Cornbread won it for the cheese category. It's super savory and I really like the onions and broccoli mixed with the course corn meal texture. Don’t be thrown off by the name or seemingly out of place ingredients. It won for good reason--well done Rob. :)


You'll need: 
1 small yellow onion, chopped
3 large eggs, lightly beaten
1 cup cottage cheese, drained
1 teaspoon salt
1-8oz. package of corn muffin mix (I used 1 cup of Bob's Red Mill Cornbread & Muffin Mix)
1/2 cup butter, melted
1-10 oz. package of frozen chopped broccoli, thawed & drained (about 1 1/2 cups)


Preheat the oven to 400 degrees F. Grease a 8x8 pan.I've made these into muffins before. They tend to stick to the paper a bit, so I recommend making it in a baking pan, or greasing the muffin pan and doing it without the paper liners. 
1) Cook onions on medium low heat over oil, until translucent. Remove from heat and let cool.

2) Stir eggs, cheese, salt together till combined. Add corn muffin mix, butter, broccoli, and cooled onions.
3) Pour mixture into baking dish and bake for 25-35 minutes, or until golden brown.
4) Let stand for 5 minutes before removing pan. 


Pin It


Thursday, April 19, 2012

s'mores stuffed cookies...revisited

I've made these S'mores stuffed cookies a few more times and have since developed a S'mores Stuffed Cookie science if you will.

A few tips and changes...
Instead of breaking the graham crackers into smaller shapes, I stick a whole S'more inside the cookie (1 graham cracker sheet broken in half, 2-3 pieces of Hershey Chocolate, and 1 marshmallow cut in half lengthwise). I thought putting a smaller cookie would make these a little more manageable, but I've found it works better with a full size.


When assembling your cookie, make the bottom layer wider in diameter than the S'more inside (or Reese's Peanut Butter Cup in this case). Then pick up the whole thing and fold up the edges to enclose S'more. Add extra dough as needed. 


This results in cookies that are about the size of my open hand (much more fun and impressive)...and much better looking than my original version.

Bake for 22-24 minutes or until browned on top and dough is cooked through. Gently move onto a cooling rack for a few minutes. Serve warm, of if you need to, microwave for 10 seconds.

Unbaked cookies can be stored in the freezer (in case of an emergency). Taking them from freezer to oven actually results in really fluffy cookies in my experience.

I'm brainstorming and would love your ideas! What else can would you want to see baked inside a cookie? 

Pin It


Tuesday, April 17, 2012

berry crisp

Spring = Sweet, tart, fresh berries (+ my favorite cookies) = Mixed Berry Amaretti Crisp. 
I'm still going through this book and loving every single recipe I've tried.

Topping:
3/4 cup flour
1/4 cup sugar
1/2 cup packed light brown sugar
3/4 cup crushed Amaretti Cookies (about 16 cookies)
1 teaspoon ground cinnamon
1/2 cup toasted almonds slices
1/2 cup unsalted butter, cut into 1/2 inch pieces, then chilled in the fridge.

You can make the topping in a food processor, but I did it with a fork/by hand. In a bowl, combine the flour, both sugars, cinnamon, almond slices. Crush amaretti cookies and add to the mixture. Add pieces of butter and combine till the dry ingredients start to hold together.

Filling: 
6 cups mixed berries
1/3 cup sugar
2 tablespoons AP Flour
2 teaspoons lemon juice 

Arrange fruit in a baking dish, ramekin or bread pan in my case. (The juice from the fruit will come out during baking, so to prevent a mess, place a piece of foil under your dish to catch any spillage; or you can just fill your dish with less filling). Sprinkle with a generous amount of the topping mixture (enough to cover all the fruit). Bake at 375 degrees F for 40-50 minutes 
Serve warm with a scoop of Vanilla Ice Cream

(I've tried the peach version and loved it as well. You can find that version and original recipe here)


Pin It


Monday, March 26, 2012

white bean and chicken chili

Nothing like a warm bowl of chili on a cold, rainy day. Served with some corn bread and this pretty much seals the deal for me. I omitted/substituted a few ingredients from the original (found here) per user comments and because I didn't have some of them handy. The outcome still delivered a tasty alternative to the normal tomato based kind. The combination makes for a super hearty and flavorful chili, with a slight kick. I love the texture and crunch the corn adds to the whole thing.


Ingredients:
2 Tablespoons olive oil
1 large onion, chopped
6 garlic cloves, minced
2 pounds of chicken breast, chopped (or you could use rotisserie chicken, just add it later in the cooking process)
1 teaspoon salt (more to taste)
2 Tablespoons ground cumin
1 tablespoon dried oregano
2 teaspoons chili powder
2 (15-ounce cans) cannellini or other white beans, rinsed and drained
1 bunch (about 1 pound) kale or Swiss chard, stems removed, and chopped into 1-inch pieces
11/2 cups frozen corn, thawed
4 cups low-sodium chicken stock
1/2 teaspoon crushed red pepper flakes
Freshly ground black pepper to taste
Parmesan cheese
1/4 cup flat leaf parsley, chopped


In a large saucepan, heat oil on medium-high heat. Add the chopped onions and cook for about 5 minutes, until onions are translucent. Lower heat if they start to brown too quickly. Add garlic and cook for another minute. Add chopped chicken, salt, cumin, oregano, and chili powder, and stir till chicken is cooked through.

Add beans, kale or Swiss chard, corn, and chicken stock. Stir ingredients and bring to a simmer. Use a wooden spoon to scrape any browned bits that got stuck to the bottom of the pan. Let simmer for about 40-50 minutes until the stock has reduced by half and the chili has thickened. Add the red pepper flakes and simmer for 10 more minutes. Add salt and pepper to taste.

Spoon into a large bowl, sprinkle with Parmesan cheese and parsley and enjoy thoroughly.


Pin It


Wednesday, March 21, 2012

ensalada azteca


Photobucket

There’s a vegan restaurant in my neighborhood that, along with this recipe, makes me believe I could live off vegan food, climb trees, climb mountains, etc. all the live long day. (I say this with the caveat that they have these awesome nachos, corn bread, a decent cheesecake as well).

This salad was the first thing I had there…and tried to recreate a few months later for one of my first dates with Abe many a years ago. My memory failed me as I ended up with a bowl of romaine, quinoa and honey mustard dressing. Fail.
Anyways, redemption came when I found this recipe on the Native Foods Blog here. It’s all kinds of crisp veggies, and the raisins and sunflowers add an unexpected flavor and texture to it; not to mention the subtle kick from the cayenne. Pow.
Altogether, I’m a fan. The ingredient list seems long, but you’ll have leftover dressing and a big, heaping, delicious, beautiful salad at the end of it.

 
For the Mango Lime Dressing:
Combine the following ingredients in a mixer and blend till smooth. Allow the dressing to sit before serving so the flavors can come together. *Note that the dressing comes out pretty thick, so you might have to use a spoon to drizzle it over your salad (vs. pouring it out of the blender or bottle).

Photobucket

1 cup of fresh (or frozen) mango
½ cup sunflower oil (I used canola; any neutral flavored oil will work)
¼ cup maple syrup
¼ cup fresh lime juice
1 Tablespoon rice vinegar
1 ½ teaspoon salt
1 ½ teaspoon fresh grated ginger

Tomato Mixture:
Combine the following ingredients in a medium bowl and toss to combine.
1 cup tomato, chopped
1 cup cucumber, peeled + chopped
1 cup jicama, chopped
1 cup avocado, chopped
½ cup red onion, minced
2 Tablespoon fresh lemon juice
½ teaspoon salt

Additional ingredients:
2 cups of mixed greens
1 cup quinoa, cooked according to instructions and cooled

Topping:
4 Tablespoons sunflower seeds
4 Tablespoons raisins or chopped dates
Slices of fresh mango
Cayenne pepper (optional)
 
To assemble Salad:
Divvy up the mix greens onto 4 plates. Top with equal amounts of quinoa, then drizzle with 2 Tablespoons of dressing.
Top with Tomato Mixture and drizzle with more dressing. Garnish with sunflower seeds, raisins, and fresh mango. Sprinkle with a dash of cayenne pepper if you don’t mind a kick. Serve and enjoy.

Pin It

Wednesday, March 14, 2012

roasted vegetables with a lemon-tahini dressing


Another David Lebovitz (<3) recipe. The dish he created in an effort to clear out his refrigerator, is now one of my favorite, staple recipes. I'm trying to eat less meat/chicken these days, so this has been in frequent rotation when I'm looking for something flavorful, filling, and vegetarian . You can use any combination of vegetables and add more herbs, like dill as David suggests for a more Mediterranean feel. I'm back on my kabocha pumpkin kick so added that to the mix, but besides a few minor adjustments, I stuck pretty closely to the original. I think I'll add some Garbanzo beans next time. 


Ingredients:
3/4 cup wild or mixed brown rice
6 cups peeled and cubed root vegetables (I used carrots, kabocha pumpkin, beets. Broccoli also tastes great)
Olive oil
Sea salt and black pepper
2 spring onions or green onions, minced
1/2 cup chopped fresh parsley and chives (or other favorite herbs)
Toasted almonds or sunflower seeds (optional)


To make Lemon-Tahini Dressing, combine:
1/4 cup Tahini (essentially a sesame paste; also used to make hummus)
1 tablespoon of fresh squeezed lemon juice
3 tablespoons water
3-4 cloves garlic, peeled and minced
1 teaspoon soy sauce
*Add more lemon juice or salt if needed. 

Cook rice according to instructions. After cooking, move rice into a bowl and let cool.

Preheat oven to 375 degrees. Toss the vegetables with olive oil, salt and freshly ground pepper.

Spread the vegetables in an even layer on a baking sheet, and bake for 30-45 minutes, or until vegetables are cooked through. Stir once or twice while baking to keep vegetables from burning. Remove from heat and let cool.


This dish is best served at room temperature. When you're ready to serve, arrange rice in a bowl, top with plenty of vegetables, drizzle with a generous amount of dressing on top, and add a few spoons of the green onion/herb mixture. Finally sprinkle with almonds! Stir and feast. :)

Make ahead: If you plan on making enough for leftovers or for the lunch the next day (which I always do), just keep all the elements separate (rice, vegetables, and dressing). Otherwise, the tahini dries out the dish.

Serves 4-6. 

Photobucket


Tuesday, March 6, 2012

italian chicken salad


Sorry to have been m.i.a. last week. Things got bizzay!...and sleep became the priority over blogging. Anyway, I'm back now...with an easy, light appetizer recipe from my girl, Giada


I made this recipe a while back for Abe's birthday dinner. I was looking for a quick recipe to add to the other Italian-ish themed dishes (although I'm not quite sure what makes this Italian besides that fact that Giada says it is...oh, or maybe the Italian parsley?) Regardless, it's a keeper. I was craving it again recently, so my measurements are for 1 rotisserie chicken, which is still a lot. But it's light, super simple, and versatile. Serve in a lettuce cup, with crackers, or even in a sandwich. I tweeked it ever so slightly (namely just took out the capers and reduced the oil in the vinaigrette). Enjoy.


PhotobucketIngredients:
Shredded chicken from 1 rotisserie chicken 
1/2 cup thinly sliced red onion
3/4 cup chopped roasted red + yellow bell peppers
1/4 cup fresh Italian parsley, chopped 
Salt + Pepper
1/4 cup slivered or sliced almonds, toasted
butter lettuce leaves


For the Red Wine Vinaigrette:
1/4 cup red wine vinegar
1/8 cup lemon juice
1 teaspoon honey
1 teaspoon salt
Freshly ground black pepper
4 tablespoons olive oil
Combine all the ingredients in a bow and whisk with a fork; slowly add the oil until well incorporated. 


For the Chicken Salad, toss together the shredded chicken, bell peppers, onion,
parsley. Add enough vinaigrette so the mixture is not dry. Add salt and pepper to taste. 


Scoop into lettuce cups and top with almonds. [I like to add the almonds on top right before serving, but feel free to mix them in the step above.]  That's it. :)


This can be made a few hours ahead. Just keep refrigerated and scoop into lettuce cups before serving. 


Photobucket


Tuesday, February 21, 2012

Eggs in a Basket

Breakfast is my favorite meal of the day. And for me, you can't beat an over medium egg and slice of toast. (Unless you're my mother and you cook a Korean feast for breakfast).


I had been meaning to try this whole 'eggs in a basket' thing since watching V for Vendetta (yes, like 5 years ago) and spotting this version on the Paupered Chef, so I finally did this weekend. Now, I don't know if it was because I cooked it on a glorious Saturday or because it's called Eggs in a Basket (and that's just fun), but this tasted SO MUCH BETTER than my usual egg slapped on a piece toast....which now sounds totally boring. Anyways, Eggs in a Basket + squeeze of Trader Joe Ketchup & 3 dots of Siracha = Breakfast Win.


To prepare: Cut a 2 1/2 inch circle into your any kind of thick cut toast.
Heat a non-stick pan with non-cooking spray (or butter). Heat the bread and center pieces, then crack your egg into the center and season with salt and pepper. Once the bread is nice and toasty, gently turn over and cook till the other side is golden brown and egg is cooked to your liking.


Pin It

Wednesday, February 15, 2012

chocolate chip banana bread {muffins}


Photobucket
Got some overripe bananas? This recipe is amazingly simple; yet the bread comes out fluffy, light, and perfectly moist...no special equipment or fancy ingredients needed. I usually make them into loafs, but these portion controlled muffins made for a great dessert/breakfast treat. 

You'll need:
2 cups flour
1 tspn baking soda
1 tspn baking powder
1 tspn salt
2 eggs
1 cup sugar
3-4 very ripe bananas
1 tspn vanilla extract
1/2 cup vegetable or canola oil
1 tspn cinnamon
*optional: semi-sweet chocolate chips tossed in a teaspoon of flour; confectioners sugar

1) Place peeled bananas in a small bowl and microwave for about 25-30 seconds. Mash with a fork and set aside to cool.
2) In a medium bowl, combine flour, baking soda, baking powder and salt.
3) In a separate large bowl, mix eggs and sugar together. Stir in the bananas, vanilla, oil and cinnamon, then add the flour mixture a third at a time. Mix to combine.
4) Optional: stir in chocolate chips. I forgot where I learned this, but if you toss the choco chips in a little bit of flour, they won't sink to the bottom when baking.
5) For muffins, bake at 325 for 18-22 minutes or until fluffy, and golden brown on top.


If you decide to make banana bread, divide batter into two 9x5 loaf pans and bake at 350 degrees for 50 minutes to an hour.


Recipe courtesy of Cathy Lowe via the Food Network


Pin It

Tuesday, February 7, 2012

s'more stuffed cookies


I had been eying this recipe from Jenny over at Picky Palate for quite some time. How can you go wrong here, really? S'more? Awesome. Chocolate chip cookie? Yes. S'more...inside a cookie? That's... electric.

My first batch were horrendous looking. They looked like a band of misfit cookies...led by a storm trooper. Second batch looked better, but mine came out much more pillowy than I expected. (Texture reminded me of these cookies). Regardless, they were pretty delicious. And fun to see people's reactions to what they were.

They taste best soon after they are made, but if you're eating them the next day, just heat them up for about 15-20 seconds and enjoy. :)

S'mores Stuffed Chocolate Chip Cookies
(courtesy of Jenny Flake--Picky Palate)

Ingredients:
2 sticks butter (softened)
1 cup sugar
3/4 cup packed light brown sugar
2 eggs
1 tablespoon vanilla extract

3 1/2 cups flour
1 tspn baking soda
1 tspn kosher salt
2 cups semi-sweet chocolate chips (I used 1 cup mini semi-sweet chocolate chips)

1 package of graham crackers
Marshmallows (regular sized cut in half)
3 Hershey chocolate bars broken into individual pieces

Beat butter, sugar, and brown sugar. Add eggs and vanilla and beat until well incorporated.

In a separate bowl, stir together flour, salt, and baking soda. Slowly add the wet ingredients into the dry and mix together. Mix in chocolate chips until well combined.


I really liked this cookie dough. Like I mentioned, the texture and fluffiness of the final cookies is similar to the brownie stuffed cookie I made a while back, but this dough was much easier to work with. I liked that it didn't stick to my hands during assembly which was my biggest qualm about the brookie recipe (must be all that buttaaa).


I ended up making a few "smaller" versions of this cookie by putting a smaller s'more in the middle. They were still HUGE. To assemble s'more cookie:

1)  Roll out spoonfuls of cookie dough into "patties". Press graham cracker into the bottom layer.
2) Layer with marshmallow, chocolate and another graham cracker.
3) Top off with another cookie patty.
4) Close the edges to make your giant monster cookie.

I played around with the assembly quite a bit. I made full size, half size, quarter size; rolled them in crushed graham crackers before baking, mixed in some crushed graham crackers into the dough before rolling out... It's kind of hard to mess these up.

Jenny's directions were to bake at 350 degrees for 15-17 minutes, but my full size cookie took about 20-24. So keep an eye on them, till they are brown around the edges. Let cool and enjoy.

**Update: Tips and Tricks to make these bad boys here


Pin It


P.S.


Related Posts Plugin for WordPress, Blogger...